
One of the most common tasks an android developer could possibly receive is to show a list of elements on screen. Even experienced developers can't remember how to do it by heart. On Android lists are usually implemented by using RecyclerView which I will be using in this article.
What you will need
- A new layout file to represent how one item of the list will look like.
- A class to bind your data with your UI. In Android development usually we use an adapter class.
- A RecyclerView layout inside the layout you would like to include the list.
- Configure the RecyclerView in the Activity/Fragment which has it.
Step-by-step
Let’s build an app which shows a list of South America countries.
1. Define a layout for you list item
Inside java > res > layout we will create a file called recyclerview_item.xml. This layout will define how the individual item in your list will look like.
Open the file and copy content below inside of it.
<?xml version="1.0" encoding="utf-8"?>
<androidx.cardview.widget.CardView xmlns:android="http://schemas.android.com/apk/res/android"
    xmlns:app="http://schemas.android.com/apk/res-auto"
    xmlns:tools="http://schemas.android.com/tools"
    android:layout_width="match_parent"
    android:layout_height="300dp"
    android:layout_margin="4dp">

    <androidx.constraintlayout.widget.ConstraintLayout
        android:layout_width="match_parent"
        android:layout_height="match_parent">

        <TextView
            android:id="@+id/textView"
            android:layout_width="wrap_content"
            android:layout_height="wrap_content"
            android:text="TextView"
            app:layout_constraintBottom_toBottomOf="parent"
            app:layout_constraintEnd_toEndOf="parent"
            app:layout_constraintStart_toStartOf="parent"
            app:layout_constraintTop_toTopOf="parent" />

    </androidx.constraintlayout.widget.ConstraintLayout>
</androidx.cardview.widget.CardView>
This layout is basically a card, using the widget CardView, with a text inside of it. The reason why we are using CardView is simple: it’s very common pattern in mobile development the use of card in lists. Besides, the items in the list looks really good and it’s easy to implement.
Inside the card you can see a ConstraintLayout. This is my personal preference, I usually find easier layout my elements with it, but in fact you can use any other layout inside of it. Feel free to use LinearLayout or RelativeLayout which are extensive used by some developers.
2. Bind layout with data using an adapter
2.1 Create the adapter class
In our little project, create file called RecyclerViewAdapter.kt. It’ll be a class. This class will receive a list which are the data we want to show in the screen. This class will extend RecyclerView.Adapter and inside the generics we will write RecyclerViewAdapter.ViewHolder. Android Studio will complain because we didn’t create the class ViewHolder. Ignore that at this point and bear with me.
class RecyclerViewAdapter(private val list: List<String>): RecyclerView.Adapter<RecyclerViewAdapter.ViewHolder>()
The Adapter is an inner class and is also abstract which means the methods which don’t have body, in other words only have the method signature, it’s mandatory to implement by the class which extends it.
The methods we will need to implement are:
- onCreateViewHolder
- getItemCount
- onBindViewHolder
2.2 Implementing onCreateViewHolder
override fun onCreateViewHolder(parent: ViewGroup, viewType: Int): ViewHolder {
    val view = LayoutInflater.from(parent.context).inflate(R.layout.recyclerview_item, parent, false)
    return ViewHolder(view)
}
2.3 Implementing getItemCount
All you will need is return the size of the list received in the constructor.
override fun getItemCount() = list.size
2.4 Implementing the ViewHolder class
Create a inner class which will extend RecyclerView.ViewHolder.
Create the method bindView which will receive the item from the list, in our case, a String object.
This method you will link the data to the text on screen.
class ViewHolder(val view: View) : RecyclerView.ViewHolder(view) {
    fun bindView(string: String) {
        view.findViewById<TextView>(R.id.textView).text = string
    }
}
2.5 Implementing onBindViewHolder
In the onBindViewHolder, call the method created in the ViewHolder class.
You could get the content from the *bindView* method and paste it directly into *onBindViewHolder*, however putting in ViewHolder class your adapter class will become smaller as a consequence your code will be easier to read.
override fun onBindViewHolder(holder: ViewHolder, position: Int) =
    holder.bindView(list[position])
The complete adapter class you can find below:
import android.view.LayoutInflater
import android.view.View
import android.view.ViewGroup
import android.widget.TextView
import androidx.recyclerview.widget.RecyclerView

class RecyclerViewAdapter(private val list: List<String>): RecyclerView.Adapter<RecyclerViewAdapter.ViewHolder>() {
    override fun onCreateViewHolder(parent: ViewGroup, viewType: Int): ViewHolder {
        val view = LayoutInflater.from(parent.context).inflate(R.layout.recyclerview_item, parent, false)
        return ViewHolder(view)
    }

    override fun getItemCount() = list.size

    override fun onBindViewHolder(holder: ViewHolder, position: Int) =
        holder.bindView(list[position])


    class ViewHolder(val view: View) : RecyclerView.ViewHolder(view) {
        fun bindView(string: String) {
            view.findViewById<TextView>(R.id.textView).text = string
        }
    }
}
3. Create a RecyclerView in the main layout
Create a RecyclerView in the layout where you want to insert a list.
For example, if you create a project from scratch, you can create it within the activity_main.xml
layout file in the path in the app > src > main > res > layout.
<androidx.recyclerview.widget.RecyclerView
       android:id="@+id/recyclerView"
       android:layout_width="0dp"
       android:layout_height="0dp"
       app:layout_constraintBottom_toBottomOf="parent"
       app:layout_constraintEnd_toEndOf="parent"
       app:layout_constraintStart_toStartOf="parent"
       app:layout_constraintTop_toTopOf="parent" />
4. Configure the RecyclerView
In order to configure the recycler view, you will need to create an adapter and a layout manager. Create the class attributes as shown below:
private lateinit var recyclerView: RecyclerView
private lateinit var viewAdapter: RecyclerViewAdapter
private lateinit var viewManager: RecyclerView.LayoutManager
Let’s create a list of countries. This will be the data source to feed the recycler view later.
private val listOfCountries = listOf( "Argentina", "Bolivia", "Brazil", "Chile",
            "Colombia", "Ecuador", "French Guiana", "Guyana", "Paraguay", "Peru",
            "Suriname", "Uruguay", "Venezuela")
Creating the Layout Manager. For this example, we will use the LinearLayoutManager, but be aware there are others you can use, but I won’t cover them this time.
viewManager = LinearLayoutManager(applicationContext, LinearLayoutManager.HORIZONTAL, false)
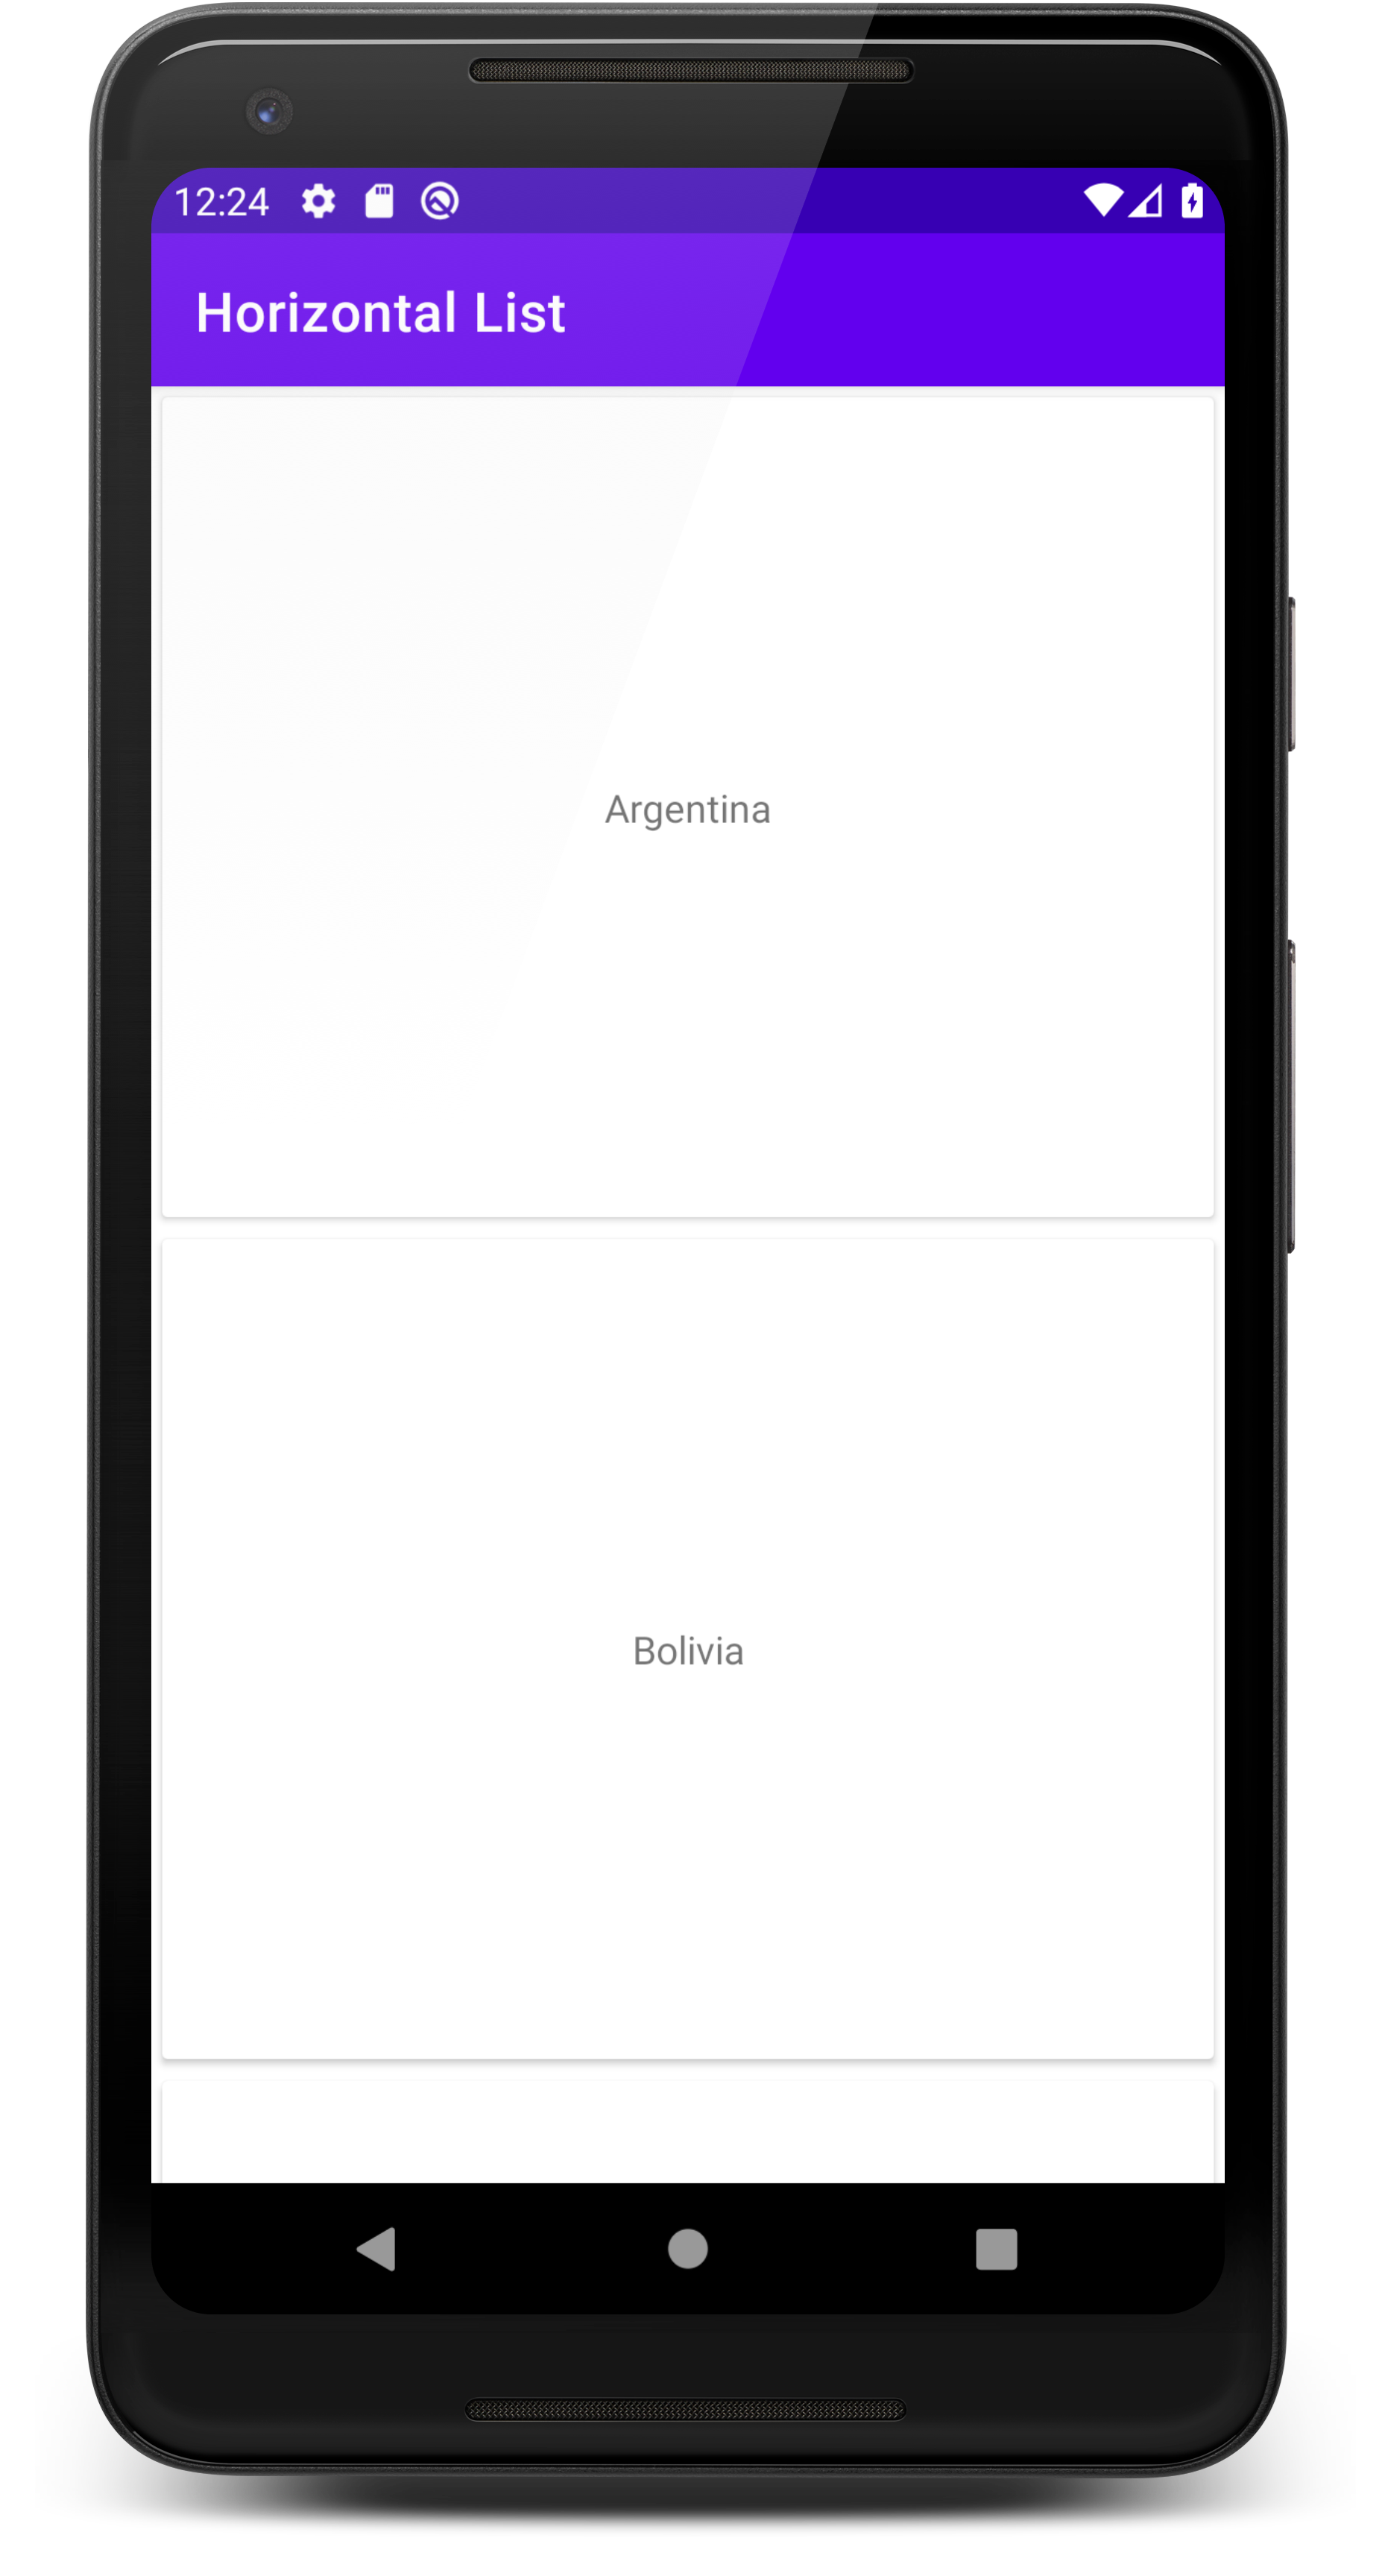
You can see the second argument is LinearLayoutManager.HORIZONTAL. This will set the list in a horizontal position, so you will interact with it by swiping from left to right and right to left. (You can’t see the other elements in the image below, but trust me, they are there.)

If you want to have a vertical list instead, just change the second argument for LinearLayoutManager.VERTICAL, so you will interact with it by swiping from top to bottom or bottom to top.
Setting the list into the adapter.
viewAdapter = RecyclerViewAdapter(listOfCountries)
And finally setting both the adapter and the layout manager into the recycler view.
recyclerView = findViewById<RecyclerView>(R.id.recyclerView)?.apply {
    setHasFixedSize(true)
    layoutManager = viewManager
    adapter = viewAdapter
}!!
The complete MainActivity you can find below:
import androidx.appcompat.app.AppCompatActivity
import android.os.Bundle
import androidx.recyclerview.widget.LinearLayoutManager
import androidx.recyclerview.widget.RecyclerView

class MainActivity : AppCompatActivity() {
    private lateinit var recyclerView: RecyclerView
    private lateinit var viewAdapter: RecyclerViewAdapter
    private lateinit var viewManager: RecyclerView.LayoutManager

    private val listOfCountries = listOf( "Argentina", "Bolivia", "Brazil", "Chile",
            "Colombia", "Ecuador", "French Guiana", "Guyana", "Paraguay", "Peru",
            "Suriname", "Uruguay", "Venezuela")

    override fun onCreate(savedInstanceState: Bundle?) {
        super.onCreate(savedInstanceState)
        setContentView(R.layout.activity_main)

        viewManager = LinearLayoutManager(applicationContext, LinearLayoutManager.HORIZONTAL, false)
        viewAdapter = RecyclerViewAdapter(listOfCountries)

        recyclerView = findViewById<RecyclerView>(R.id.recyclerView)?.apply {
            setHasFixedSize(true)
            layoutManager = viewManager
            adapter = viewAdapter
        }!!
    }
}
If you have done everything correctly, you might have a list showing like on of the examples below depending of which argument you used when you created the LinearLayoutManager:
Sample application
You can find a small working application here.
Related Links
